Sep 23, 2009
Ultrasonic Thickness Gauge
CNC Machine
- EDM
- Lathes
- Sheet metal works
- Drills
- WOod routers
- Hot-wire foam cutters
- Plasma cutting
- Laser cutting
- Oxy-fuel
- Surface grinders
- Cylindrical grinders
- Water jet cutters
Sep 21, 2009
Material Handling
Press
- Type of frame
- Source of power
- method of actuation of slides
- Number of slides incorporated
- Intended use
Sep 20, 2009
Sheet Metal
This sheet metal can be cut bend into a variety of shapes. The thickness of sheet metal is called gauge.
Sheet metals are available from the materials like aluminum, steel, tin, brass, nickel, copper, titanium. These sheet metals are used for car bodies, airplane wings, medical tables, roofs.
Sep 19, 2009
Clamps
- Workpiece must be held rigidly while the cutting tools are in operation
- time required for loading or unloading the tool must be as short as possible(quicker in acting)
- When subjected to vibration chatter or heavy pressure the clamping must be positive
- the clamp must not damage the workpiece.
Metal roofing
Chuck
Taps
Punches
Sep 18, 2009
Drill
- Drills used for hard materials like rock, concrete.
- Drills used to bore holes in earth for water or oil.
- Drills used to drive screws.
- Drills used for Machining.
Drilling
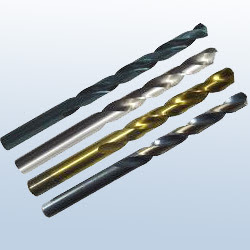
In drilling process a hole is created or enlarged by using multi point tools, end cutting tools, fluted tools.
- Reaming
- Tapering
- Counterboringg
- Countersinking
- Centering
- Spotfacing
Sep 17, 2009
metal cutting machine tool
- cutting tools
- Forming tools
Cutting tools : removal of metal is in the form of chips.
Ftools : either deforms the metal by making them flow into new shapes or by shearing them into new shapes.
Cutting tools are divided into- single point cutting tools
- Milling cutters
- Drills and Drilling
- Types of drills
- Reamers
- Taps
Drill bit
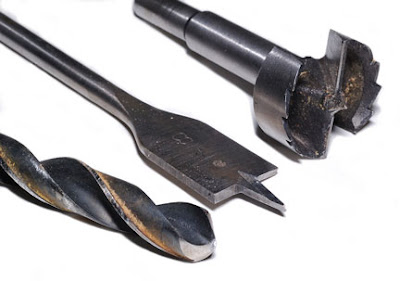
The outward apperarance of the standard twist drill has not changed during the pst 50 years. Basically it consits of a shank for mounting into the drilling machine, helical flutes that form rake angles and permit the escape of chips, and two cutting edges seperated by a chisel edge.
Twist drills are end cutting tools with one or more cutting edges having helical or straight flutes or grooves adjajcent for the admission of the coolant and the ejection of cutting or chips.
Sep 15, 2009
Digital Gauges
Plug gauges
- Taper lock ( below 1.5 in diameter)
- Trilock (above 1.5 in diameter)
Pressure Gauges or Vacuum gauges
Strain gages
12 Gages
1. Ring gages
2. Receiving gages
3. Plug gages
4. Pin gages
5. nap gages
6. length gages
7. Flush-pin gages
8. Thread gages
9. Form gages
10. Template gages
11. Go not go gages
12. Taper gages
Small Gages
Master gages
Fixed gages
Types of gages
Gaging methods
- Parallelism : used for checking two flat surfaces are parallel to each other.
- Squareness : To check two flat surfaces normal to each other.
- Concentricity : To check that points on a cylindrical surface are concentric to a common axis.
- Flatness : To check every element of a surface is within a specified distance from a nominal surface plane.
- Distance : To specify relative location of the various components and elements of the workpiece .
- Angularity : To specify a angle between 2 flat surfaces, other that 90 degrees
- Surface texture : Similar to flatness but concerned with irregularities in a surface rathe than straightness and alignment.
Gauge
- Its a device/ equipment used for investigation the dimensional fitness of a part for a specified function
- It is defined as a process of measuring manufactured materials to get specified uniform sizes and contour required by the industries.
Economy factor of strip layout
Stock material conservation is a decisive factor in press working. All possible means should be tired to attain this without sacrificing the accuracy requirement of the piece part.
Economy of any strip layout in percentage is found out by the following formula
Economy factor (E) in % = (Area of the blank x number of rows x 100)/ (width of the strip x Pitch)
Strip layout
- Strip development refers to the choice of operations to be performed in each of the stations in a progressive die. It is essential that the strip is properly developed since it will ultimately result in the best design of the die. Some of the principles that are to be followed are as follows:
- Always pierce the piloting holes in the first station, this helps in proper registering of the strip for the subsequent stations.
- . If numbers of punched holes are very close, distribute them in more than one station so that the die block remains strong. Similarly, holes nearer to the edge should be done in separate stations.
- . A complex contour be normally split into a combination of simple shapes and punched out a number of stations. This eliminates the expensive way of making a complex punch.
- Use ideal stations in the strip development stations refer to the stations in a progressive die where no piercing or blanking is done. Some of them are used for simple piloting.
Sep 14, 2009
Back plate
Back plate
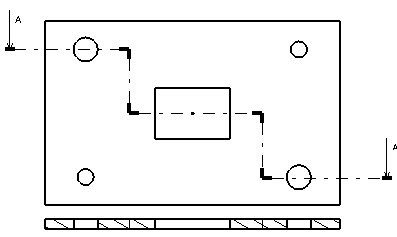
This plate is also known as thrust plate. This plate is mounted on top of the punch holder. It is made out of medium carbon steel. It is hardened and tempered to 45 to 48 HRC. Punch heads have direct contact with this plate, which will prevent the punch penetration into top plate, which will prevent the punch penetration into top plate during punching operation.
Sep 13, 2009
Punch
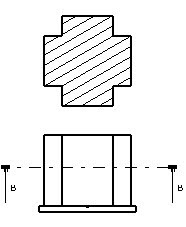
This is one of the most important elements of the tool. It is the cutting element of the tool. Punch gives the hole size and the shape on the component. This is made out of high carbon high chromium material. Punches are hardened and tempered to 58-60HRC. The length of the punch in normal condition is kept up to 60mm. Opposite end of the cutting face is shouldered or tapered to mount on top unit
Sep 12, 2009
ULTRASONIC MACHINING
Die plate
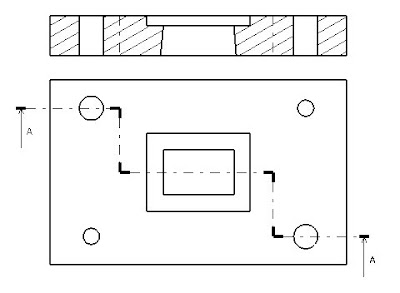
Die plate
This is most on of the important element of the tool. This is mounted on bottom plate. Die plate is the cutting element of the tool which gives the blank size and shape. This is made out of high carbon high chromium steel material. It is hardened and tempered to 60-62 HRC. Die plate thickness is decided on the basis of stock material being cut.
Sep 11, 2009
Pilots
The pilot positions the stock strip in relation with the die opening. This is termed as registering the stock in the required position. Usually the stock strip is over fed than the actual pitch length. The maximum over feeding of the strip is about 0.1mm. When the press is tripped the pilot comes down and engages the pre pierced hole, thus dragging the strip back into the registry position.
The accuracy with which the work can be registered depends upon the proper location and the diameter of the pilot.
The following will indicate the pilot diameter;
For an average work, ø of pilot = ø of hole to be piloted-0.05 to 0.1 mm
For close work, ø of pilot = ø of hole to be piloted - 0.03 to 0.05 mm
For accurate work, ø of pilot = ø of hole to be piloted – 0.01 to 0.02 mm
Registering the strip must be complete before the cutting punches come and engage the strip. Therefore the pilots must be longer than the punches. If the pilots are too short, they cannot perform their function. This creates serious consequences ranging from spoiled work to damaged pilots. In any case the piloting length should extend beyond the punch face equal to one sheet thickness.
Methods of piloting
Methods of piloting
There are two methods of piloting in progressive dies.
1. Direct piloting: Direct piloting consists of piloting in holes pierced in that area of the strip, which become the blank.
2. Indirect piloting: indirect piloting consists of piercing holes in the scrap area of the strip and locating by these holes at subsequent operations. Direct piloting is the preferred method, but certain blank conditions require pilot.
Stripper plate
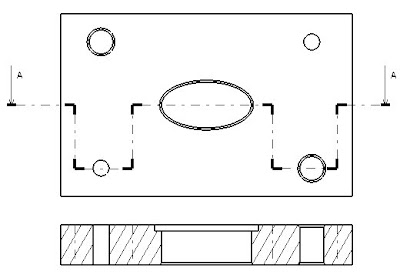
This plate is also called as stripper plate. In guide plate tool this element is known as guide plate. This plate helps in stripping operation. It not only strips the strip from the punch but the main function of this plate is to guide the punch accurately and maintain the alignment of this plate is to guide the punch accurately and maintains the alignment between punch and die. Hence the plate is made with the same care as die. It is mounted on die plate. It is made out of mild steel. In some cases this guide plate is also made out of tool steel. A channel is milled in the plate, which will guide the stock strip.
Guide bushings
Accurately ground sleeves, or guide bushings, engage guide pillars for aligning the top plate with the bottom plate. Most bushings are made of tool steel although they are also available in bronze. Pillars and bushings are assembled by shrink fitting into holes bored in the top plate and the bottom plate. The pillars and bushings are subjected to deep freezing, thereby reducing there diameter. They are then inserted in the top plate and bottom plate and upon warming to room temperature, they expand to provide a tight fit between components.
Each guide bushing is provided with a fitting for lubrication.
Stopper
Stopper
The stopper shown is a plain cylindrical pin. The pin is mounted in the die block. The function of the stopper is to arrest the movement of the strip when it is fed forward to one pitch length. Various types of stoppers are available.
Sep 10, 2009
Critical stages in shearing
Stage 1: Plastic deformation
Stage 2: Penetration
Stage 3: Fracture
Gauges (strip guide)
In most of the press tools, the stock material is fed into the tool in the form of long strips. For the efficient functioning of the tool, the strip should be guided longitudinally during its travel through the tool. This is achieved by employing gauges. In a press tool whenever the stock material is fed in the form of strip it is fed in between the back gauge and the front gauge. Back gauge is the actual gauging member and the function of the front guage is only to provide an approximate gauging.
Sep 9, 2009
Stage 1: Plastic deformation
The pressure applied by the punch on the stock material tends to deform it into the die opening when the elastic limit is exceeded and by further loading, a portion of the material will be forced into the die opening in the form of an embossed pad on the lower face of the material and will result in a corresponding depression on its upper face. This stage imparts a radius on the upper edge of the opening in the strip and on the lower edge of the punched out material (blank or slug). This is called the stage of plastic deformation.
Stage 2: Penetration
As the load is further increased, the punch will penetrate the material to certain depth. An equally thick portion of the metal is forced into the dies. This imparts a bright polished finish (cut band) on both the strip and the blank or the slug. On optimum cutting conditions the cut band will be 1/3rd the sheet thickness. This is the penetration stage.
Stage 3: Fracture
In this stage, fracture starts from both upper and lower cutting edges.
As the punch travels further, these fractures will extend towards each other and meet to cause complete separation. This stage imparts a dull fractured edge. This is the fracture stage.
Non-cutting punches
They do the operations like bending, forming, drawing etc.
Sep 8, 2009
Hybrid punches
Hybrid punches do both cutting and non cutting operations like shear and form, punch, trim etc.
Guide pillar
Guide pillars are precision ground pins which are press tool fitted into accurately bored holes in the bottom plate. They engage guide bushings to align punch and die components with a high degree of closeness and accuracy. Guide pillars for precision die sets are hard chromium plated to provide a high degree of resistance to wear.
Punches
Punches are classified into three categories
· Cutting punches
· Non-cutting punches
· Hybrid punches
Cutting punches
Cutting punches do the operations like blanking, piercing and notching, trimming etc,
Sep 7, 2009
Shank
Shank is a tool element. This is fixed on the top plate. Shank is fixed in the press ram. This should be strong enough to take the total weight of the punch until and stripping force. The diameter of the shank fits the bore within the press ram. The shank diameter is standardized in relation with the press ram. The shank diameter is standardized in relation with the press ram bore, which is varying from press to press depending on the capacity of the press.
There are different types of shank standards. Selection of the shank is based on the need base. It is made out of mild steel. The location of the shank point is very important and different load acting on top plate is to be considered. The balancing of cutting punches is one of the most important aspects to be considered during the punching operation. Unbalanced force distribution on the tool top may cause under wear on the punch and die as well as on the pillars. The resultant force of all the cutting forces, acting on many different punches should pass through the shank centre.
Sep 6, 2009
INTRODUCTION TO CATIA
CATIAV5 serves the basic design tasks by providing different workbenches. A work bench is defined as a specified as a specified environment consisting of a set of tools, which allows the user to perform specific design tasks in particular area. The basic workbenches in CATIAV5 are as follows:
Part Workbench
The Part Design workbench is parametric and feature based environment, in which you can create solid models. The basic requirement for this is a sketch. The sketch for the features is drawn in the sketcher workbench that can be invoked with the part design workbench by choosing the sketcher button. The tools in the part design workbench can be used to convert sketch into sketch-based feature. Some of the tools are there to apply the placed features, such as fillets, chamfers, and so on. These features are called dress-up features. We can also assign materials to the model in the part design workbench.
Wireframe and Surface Design workbench
The Wireframe and Surface Design workbench is also parametric and feature-bases environment, in which we can create wireframe or surface models. The tools in this workbench are similar to those in the part design workbench. The only difference is that the tools in this environment are used to create basic and advanced surfaces. We are also provided with the surface editing tools, which are used to manipulate the surfaces to obtain the required shape.
Assembly Design Workbench
The Assembly Design workbench is used to assemble the components using assembly constraints available in the workbench. There are two types of assembly design approaches:
1. Bottom Up
2. Top Down
In the bottom-up approach of the assembly of the assembly, the previously created components are assembled together to maintain their design intent.
In top-down approach, components are created inside the assembly in the assembly design workbench.
Drafting Workbench
The Drafting workbench is used for the documentation of the parts or assemblies created earlier in the form of drawing views and their detailing. There are two types of drafting techniques.
1. Generative Drafting
2. Interactive Drafting
The generative drafting technique is used to automatically generate the drawing views of the parts and assemblies. The parametric dimensions added to the component in the part design workbench during its creation can also be generated and displayed automatically in the drawing views. The generative drafting is bi-directionally associative in nature. we can also generate the Bill of Material(BOM) and balloons in the drawing views.
In interactive drafting, we need to create the drawing views by sketching the using the normal sketching tools and then adding dimensions.
Stripper plate
This plate is also called as stripper plate. In guide plate tool this element is known as guide plate. This plate helps in stripping operation. It not only strips the strip from the punch but the main function of this plate is to guide the punch accurately and maintain the alignment of this plate is to guide the punch accurately and maintains the alignment between punch and die. Hence the plate is made with the same care as die. It is mounted on die plate. It is made out of mild steel. In some cases this guide plate is also made out of tool steel. A channel is milled in the plate, which will guide the stock strip.
Gauges (strip guide)
In most of the press tools, the stock material is fed into the tool in the form of long strips. For the efficient functioning of the tool, the strip should be guided longitudinally during its travel through the tool. This is achieved by employing gauges. In a press tool whenever the stock material is fed in the form of strip it is fed in between the back gauge and the front gauge. Back gauge is the actual gauging member and the function of the front guage is only to provide an approximate gauging.
Guide pillar
Guide pillars are precision ground pins which are press tool fitted into accurately bored holes in the bottom plate. They engage guide bushings to align punch and die components with a high degree of closeness and accuracy. Guide pillars for precision die sets are hard chromium plated to provide a high degree of resistance to wear.
Guide bushings
Accurately ground sleeves, or guide bushings, engage guide pillars for aligning the top plate with the bottom plate. Most bushings are made of tool steel although they are also available in bronze. Pillars and bushings are assembled by shrink fitting into holes bored in the top plate and the bottom plate. The pillars and bushings are subjected to deep freezing, thereby reducing there diameter. They are then inserted in the top plate and bottom plate and upon warming to room temperature, they expand to provide a tight fit between components.
Each guide bushing is provided with a fitting for lubrication.
Stopper
The stopper shown is a plain cylindrical pin. The pin is mounted in the die block. The function of the stopper is to arrest the movement of the strip when it is fed forward to one pitch length. Various types of stoppers are available.
Dowel pin
This is cylindrical pin hardened and ground on center less grinder. This dowel is made to M6 tolerance. Dowel pins keep the alignment between the plates and prevent it from lateral movement. Dowel hold parts in perfect related alignment by absorbing side pressures and lateral thrusts. Also they facilitate quick disassembly of parts and reassembly in their exact former relationship.
Screws
This is fastening element, the main function of a fastener is to hold or clamp two or more elements together in position. The sizes of the screws are selected on the basis of tool size.
Sep 5, 2009
Bulging
Bulging tools expand the bottom of the previously drawn shells. The bulged bottoms of some types of coffee pots are formed in bulging tools.
Forming
Embossing
Bending
Bending tools apply simple bends to stampings. A simple bend in which the line of bend is done in which the line of bend is straight. One or more bends may be involved, and bending tools are a large important class of press tools.
Broaching
Broaching operations are similar to shaving operation. A series of teeth removes metal instead of just one tooth as in shaving.
Sep 4, 2009
Types of dies
Conventional stamping dies fit into three major categories of die construction.
They are simple, compound & progressive.
Simple die
A simple die is typically one that perforates holes in a part by or blanks out the part using punches in conjunction with mating lower die components (Matrixes). Basic forms, notching and lancing are also commonly performed in simple dies.
Simple dies rely on a press operator to load and unload parts and part material before and after each cycle of the press.
Compound die
A compound is one that blanks and perforates a part at the same time and at the same station. In most cases a hole or holes are perforated down while the part is blanked up. This allows the slugs from those holes to fall through the die however, this leaves the part in the die requiring some means of part removal.
Compound dies are commonly run as single hit dies but can be run continuously with a feeder provided the part can be removed in a timely manner.
The advantages of building a compound die are;
1) Requires minimal space in the press.
2) Leaves all burrs in one direction.
3) Superior accuracy between holes and trim edges.
4) More economical to build than a progressive die.
A disadvantage of building a compound blank die is the limited space which ends to leave die components thin and weak. This concentrates the load and shock on punches and matrixes resulting in tooling failures.
Progressive die
Progressive die consists of multiple stations aligned in a row with part being fed from station to station by being attached to the skeleton until the last station, where it is cut-off. Progressive dies are used for batch production of small to medium size components. Progressive dies provide an effective way to convert raw coil stock into a finished product with minimal handling. As material is fed from station to station in the die, it is progressively worked into a completed part.
Progressive dies usually run from right to left. Early stations typically are used to perforate holes that can be utilized by pilots to locate the stock strip in later stations.
Single action press
These are used for general press work throughout the industry. The number of actions is given by number of slides. or rams, operating in a common axis and mounted within the same frame.
Double action press
A double action press as its name implies has two slides operating along the same axis yet independent in their movements. In double action presses the second slide being an additional mechanism is spaced around the first original slide.
Triple action press
Triple action presses have three slides independent in their movement yet assembled within the same press frame. These presses are quite useful for complex drawing operations, where for example drawing has to be performed in more than one direction. In such a case the first drawing punch and the blank holder may draw the part to the appropriate size and dowel to allow for the third slides movement which pulls the material in another direction.
Multislide Press
May contain several slides assembled within a single press frame, with their range of operation along various axes. These slides may perform all kinds of work, either progressive or not.
Hydraulic Press
These are slower than mechanical presses but their tonnage force is maintained constant throughout the stroke no matter.
Assembly tools
Progressive operations
Progressive operations are those in which progressive tools perform work at a number of stations simultaneously. A complete part is cutoff blanked at the final station, with each stroke of the press.
Compound
Compound tools pierce and blank simultaneously at the same station. They are more expensive to build and they are used where considerable accuracy is required in the part.
Extruding
Extruding tools cause metal to be extruded or squeezed out, much as toothpaste is extruded from its tube when pressure is applied. Figure shows a collapsible tool formed and extruded from a solid slug of metal.
Swaging
In swaging operations, drawn shells or tubes are reduced in diameter for a portion of their lengths.
Curling
Curling tools curl the edges of a drawn shell to provide strength and rigidity. The curl may be applied over a wire ring for increased strength. You may have seen the tops of the sheet metal piece curled in this manner. Flat part may be curled also. A good example would be a hinge in which both members are curled to provide a hole for the hinge pin.
Lancing
It is a combination of cutting and bending operation along a line in the work material.
Drawing
Drawing tools transform flat sheets of metal into cups, shells or other drawn shapes by subjecting the material to severe plastic deformation. Shown in fig is a rather deep shell that has been drawn from a flat sheet.
Shaving
Shaving removes a small amount of material around the edges of a previously blanked stampings or piercing. A straight, smooth edge is provided and therefore shaving frequently performed on instrument parts, watch and clock parts and the like.
Piercing
Piercing tools pierce holes in previously blanked, formed, or drawn parts. It is often impractical to pierce holes while forming because they would become distorted in the forming operation. In such cases they are pierced in a piercing tool after forming.
Trimming
When cups and shells are drawn from flat sheet metal the edge is left wavy and irregular, due to uneven flow of metal. This irregular edge is trimmed in a trimming die. Shown is flanged shell, as well as the trimmed ring removed from around the edge. While a small amount of material is removed from the slide of a component or strip is also called as trimming.
Parting off
It is similar to cut off operation except the cut is in double line. Parting off is an operation which involves cutoff operation to produce blank from the strip as shown in figure. During parting, some scrape is produced. Therefore parting is next best method for cutting blanks.
Cut off
Cut off operations are those in which stop of suitable width is out to length to single. Preliminary operations before cutting off include piercing, notching and embossing. Although they are relatively simple, cut-off tools can produce many parts.
Blank
Blanking
When a component is produced with one single punch and die with entire periphery is cut is called blanking. Stamping having an irregular contour must be blanked from the strip. Piercing embossing and various other operations may be performed on the strip prior to the blanking station.
Blank is the part which is used from the sheet metal after operation.
Various operations performed in press tools
Blanking
Cut off
Parting off
Trimming
Piercing
Broaching
Embossing
Bending
Forming
Drawing
Lancing
Curling
Bulging
Swaging
Compound
Progressive operations
Assembly tools
Press tools
Press tools are special tools custom built to produce a component mainly out of sheet metal. The principle operations of sheet stampings include cutting operations (shearing, blanking, piercing, etc.) and forming operations (bending, drawing, etc,). Sheet metal items such as automobile parts, components of aircraft, parts of business machines, household appliances, sheet metal parts of electronic equipments, precision parts required for homological industry etc., are manufactured by press tools.
